Getting Started
Introduction
MakePDF was created to simplify the design and generation process of a PDF.
Key Features
- Template-Based Design: Easily create and manage PDF templates with both fixed and variable parts, allowing for dynamic content generation.
- Plugin Support: Extend functionality with plugins for text, images, and barcodes, including QR codes, to enhance your PDF documents.
- Cross-Platform Compatibility: Generate PDFs seamlessly in both Node.js and browser environments.
- User-Friendly UI: Utilize the integrated Designer, Form, and Viewer components to design, input, and preview PDFs with ease.
- Custom Schema Creation: Develop your own schemas to support unique data types and rendering requirements.
- Performance Tracking: Monitor PDF creation time to optimize and improve the generation process.
- Subscription-Based Features: Access advanced tools and capabilities through a subscription model, ensuring continuous updates and support.
Template
The core of MakePDF library are Templates.
A template can be divided into two parts: a fixed part and a variable part.
We call them basePdf and schema.
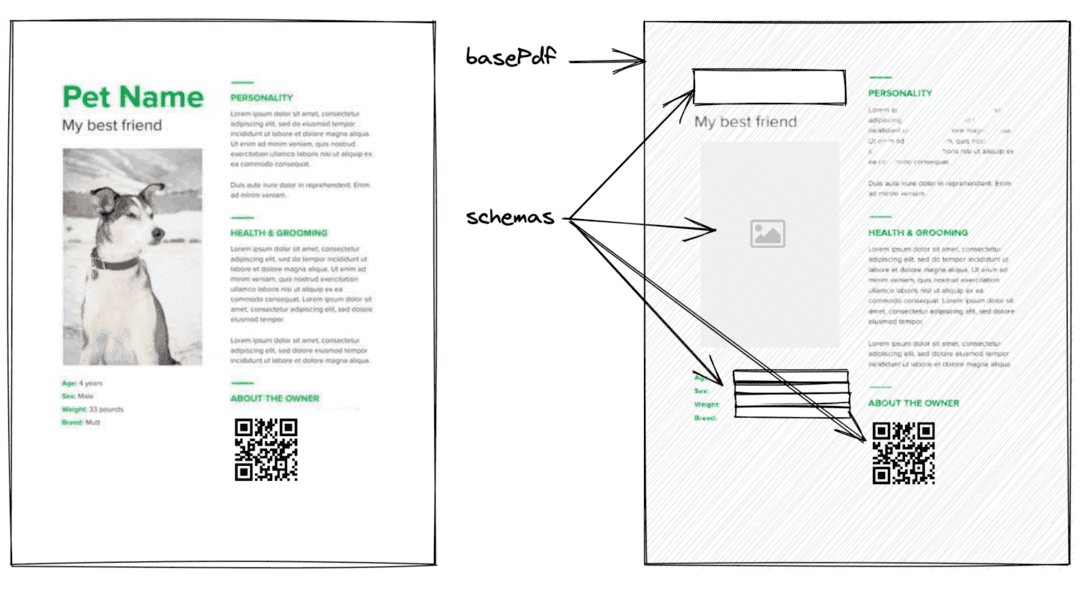
The following image is a good illustration of a template.

- basePdf: PDF data for the fixed part of the PDF to be generated.
- schemas: Definition data for the variable part of the PDF to be generated.
basePdf can be given a string(base64), ArrayBuffer, or Uint8Array.
A blank A4 PDF can be imported with BLANK_PDF. You can use it to check how it works.
schemas can only utilize text by default, but you can load images and various barcodes like QR codes as plugins from the package.
Let's take a look at some specific data.
(If you are using TypeScript, you can import the Template type.)
Minimal Template
import { Template, BLANK_PDF } from 'common';

const template: Template = {
  basePdf: BLANK_PDF,
  schemas: [
    [
      {
        name: 'a',
        type: 'text',
        position: { x: 0, y: 0 },
        width: 10,
        height: 10,
      },
      {
        name: 'b',
        type: 'text',
        position: { x: 10, y: 10 },
        width: 10,
        height: 10,
      },
      {
        name: 'c',
        type: 'text',
        position: { x: 20, y: 20 },
        width: 10,
        height: 10,
      },
    ],
  ],
};
You can create a template from Template Design page. Or, if you want to integrate the template creation feature into your application, check out the Designer section.
Generator
The PDF generator function, generate, takes 2 arguments of template and inputs for generate a PDF. It works both in Node.js and in the browser.
The code to generate a PDF file using the template created above is shown below.
import type { Template } from 'common';
import { generate } from 'generator';

const template: Template = {
  // skip... Check the Template section.
};
const inputs = [{ a: 'a1', b: 'b1', c: 'c1' }];

generate({ template, inputs }).then((pdf) => {
  console.log(pdf);
});
You can create a PDF file like the below.
Also, each element in the inputs array corresponds to a page in the PDF, you can create a multi-page PDF file by providing multiple elements of inputs.
UI
The UI is composed of the Designer, Form, and Viewer classes.
Designer
The Designer allows you to edit the Template schemas, making it easy for anyone to create Template json objects.
You can design your own template from Template Design page, or you can integrate the designer into your application.
Let's integrate the designer using the template created above as the default template.
import type { Template } from 'common';
import { Designer } from 'ui';

const domContainer = document.getElementById('container');
const template: Template = {
  // skip... Check the Template section.
};

const designer = new Designer({ domContainer, template });
The Designer class is instantiated as shown above, and the template designer is displayed in the domContainer.
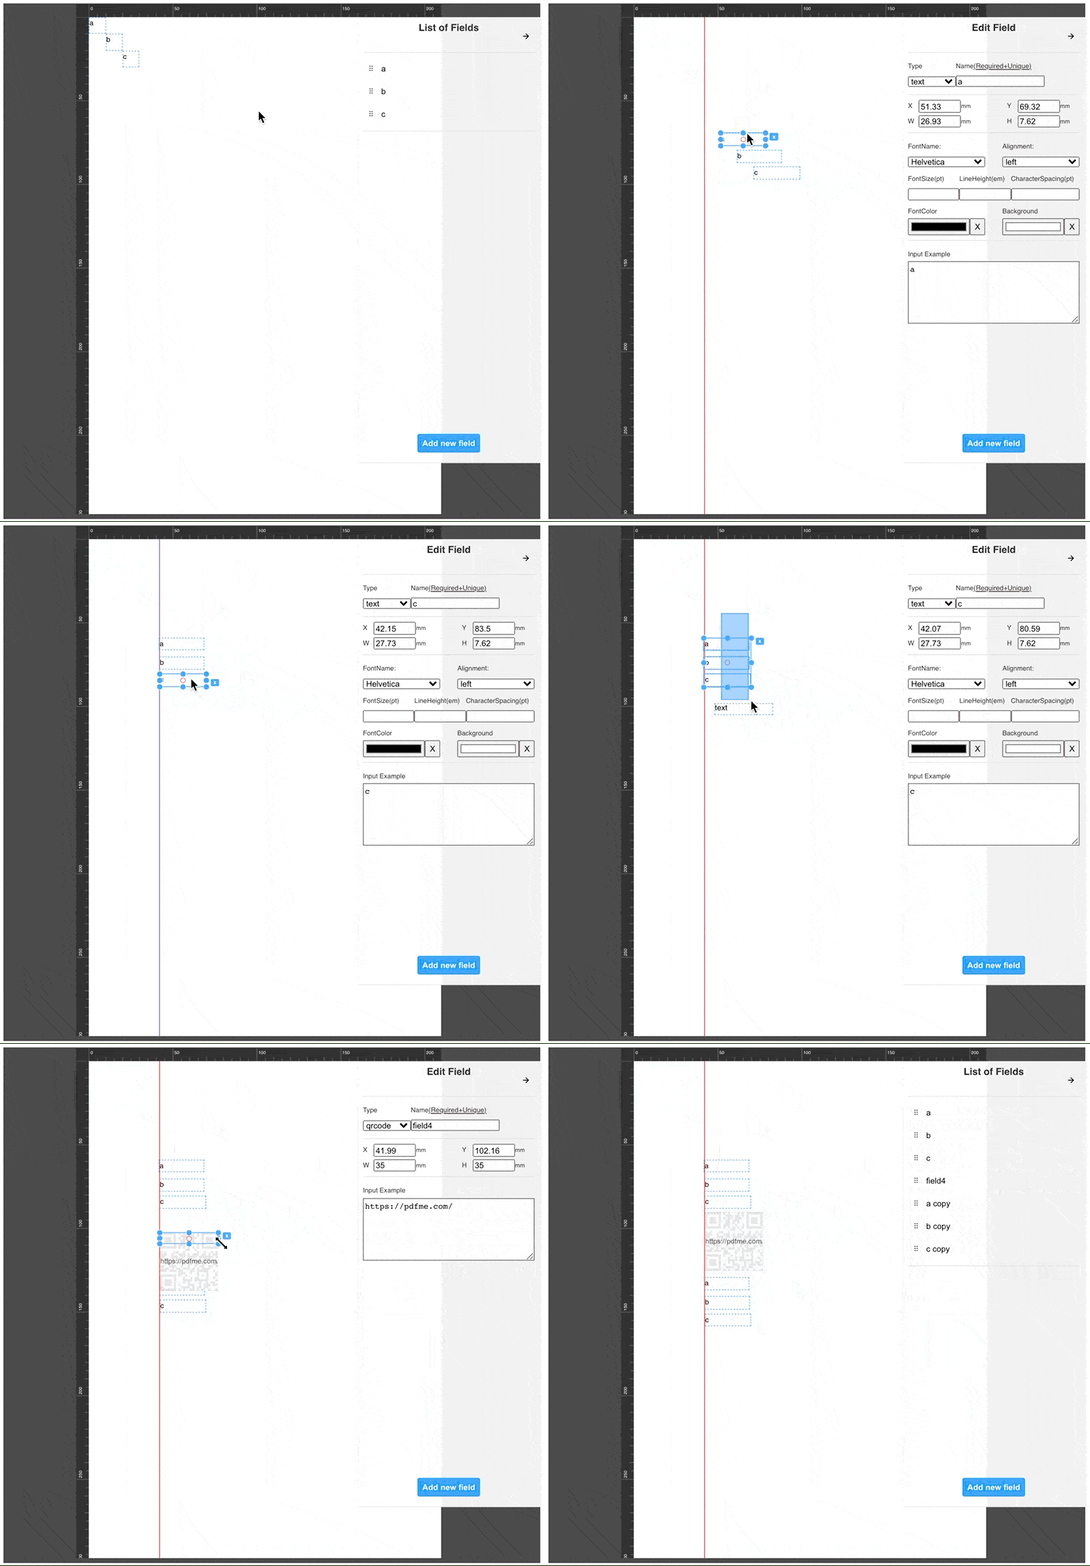
You can edit the template as shown below. The operation is like Google Slides, etc., so you can use common keyboard shortcuts.

The designer instance can be manipulated with the following methods.
saveTemplateupdateTemplategetTemplateonChangeTemplateonSaveTemplatedestroy
Form
You can use templates to create forms and PDF viewers.
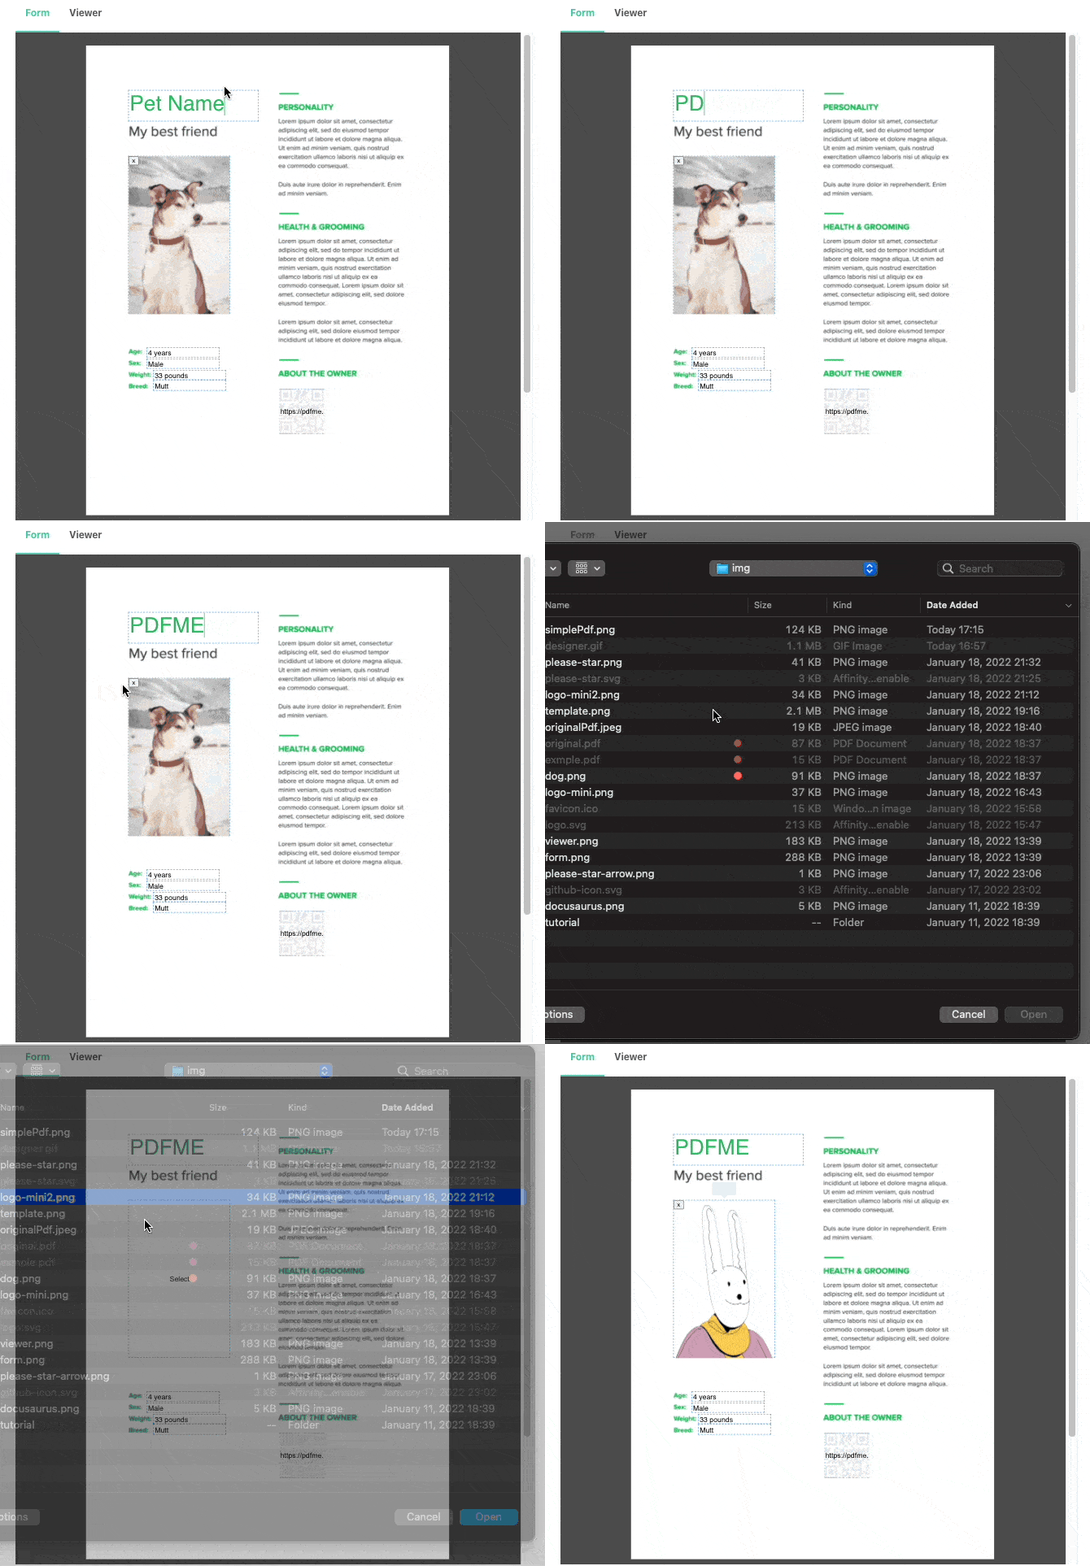
The Form creates a UI for the user to enter schemas based on the template.
import type { Template } from 'common';
import { Form } from 'ui';

const domContainer = document.getElementById('container');
const template: Template = {
  // skip...
};
// This is initial data.
const inputs = [{ a: 'a1', b: 'b1', c: 'c1' }];

const form = new Form({ domContainer, template, inputs });

The form instance has a method getInputs to get the user's input.
You can generate a PDF file based on the user's input by passing the data you get from getInputs as inputs to generate, as shown in the code below.
generate({ template, inputs: form.getInputs() }).then((pdf) => {
  const blob = new Blob([pdf.buffer], { type: 'application/pdf' });
  window.open(URL.createObjectURL(blob));
});
Viewer
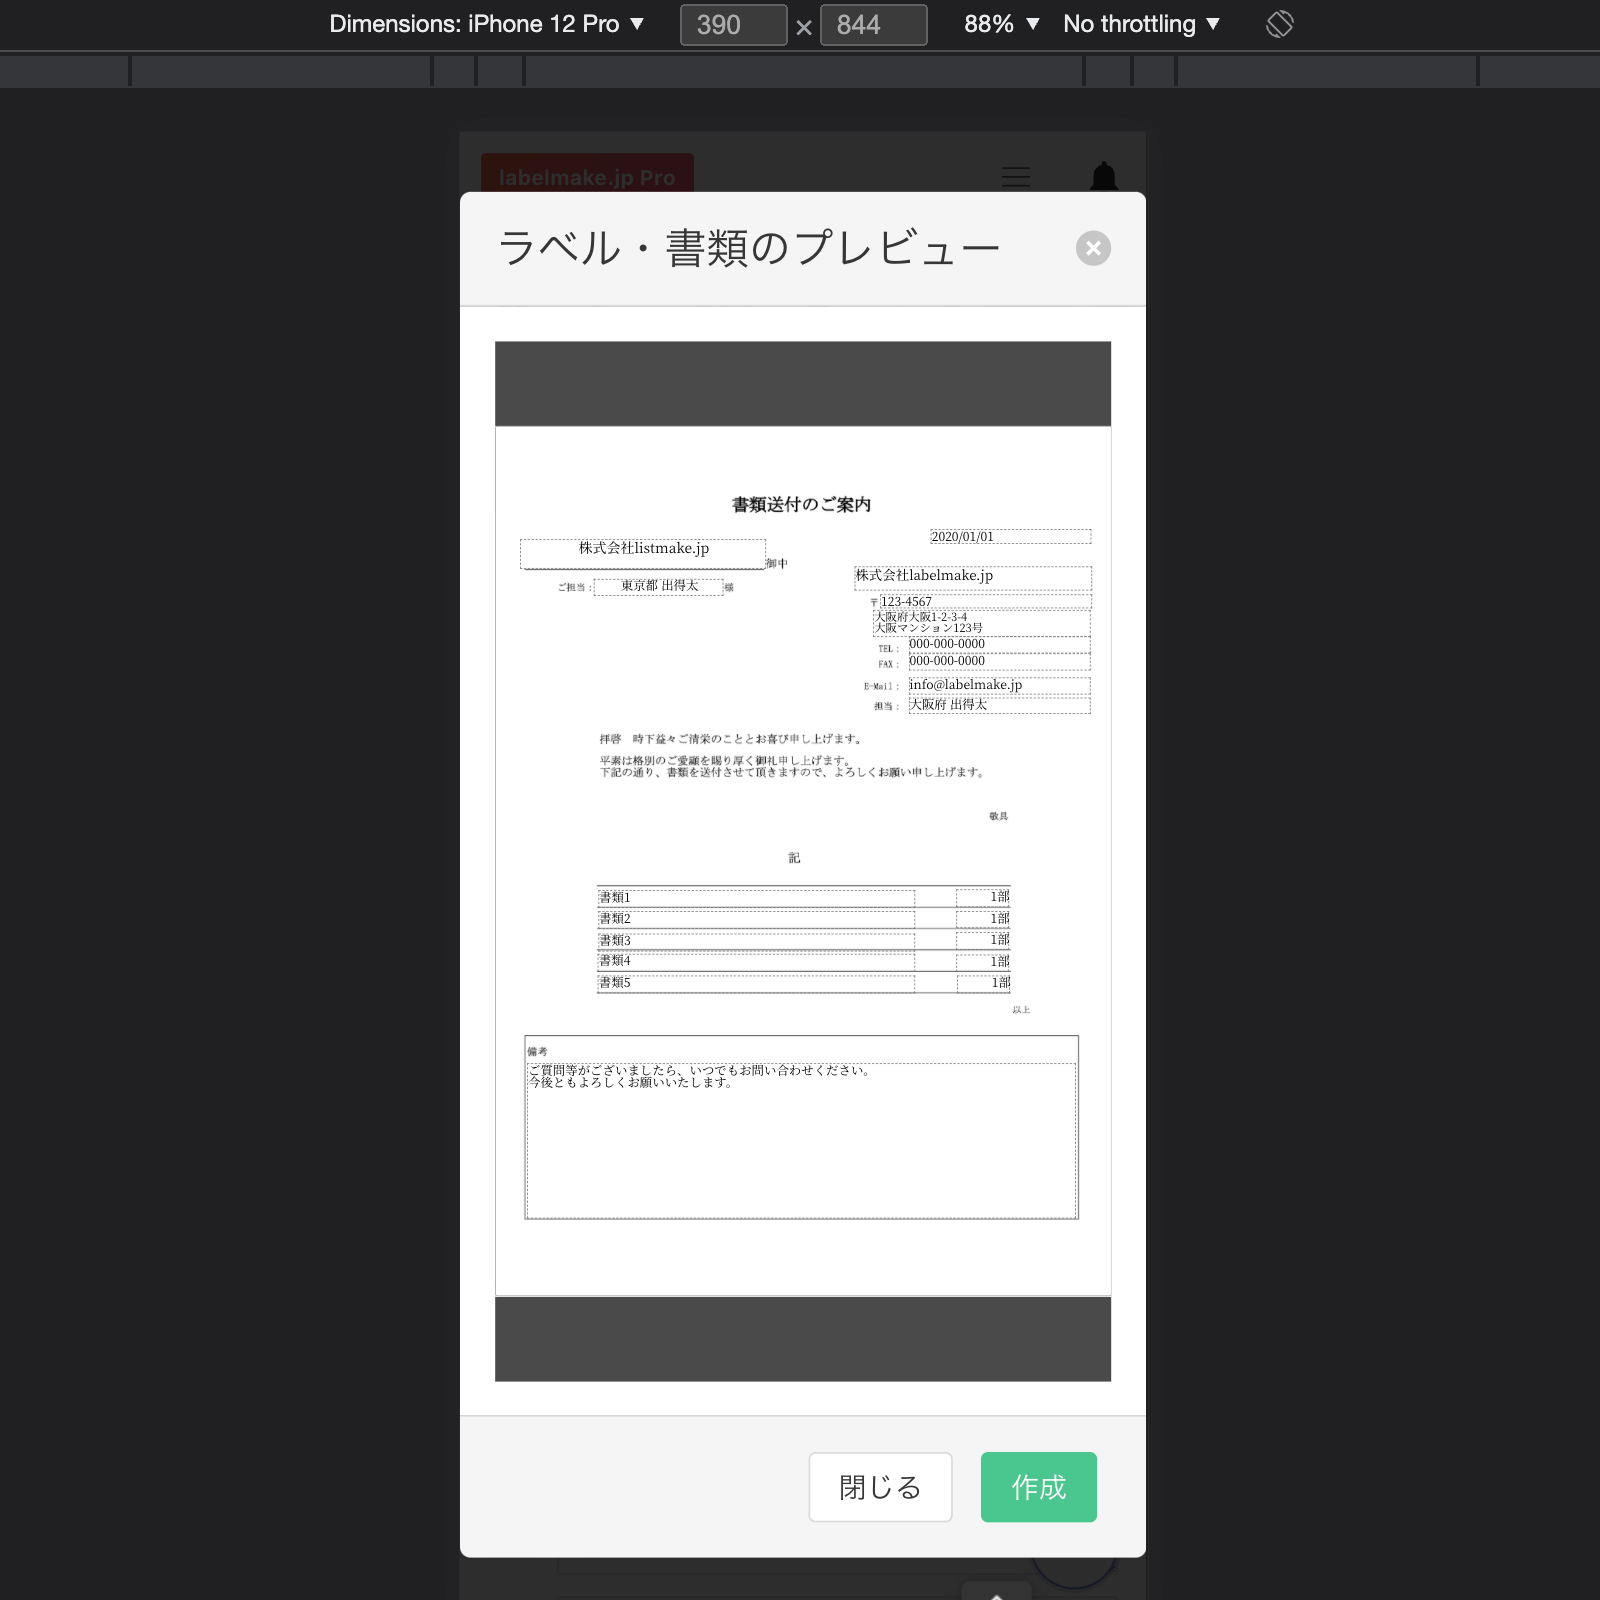
Viewing a PDF file in a mobile browser is a pain, because it doesn't display well in an iframe.
The Viewer is a byproduct of the Form development process, but it allows you to show your users a preview of the PDF file you will create.
Using the Viewer is basically the same as using the Form, except that user cannot edit it.
import type { Template } from 'common';
import { Viewer } from 'ui';

const domContainer = document.getElementById('container');
const template: Template = {
  // skip...
};
const inputs = [{ a: 'a1', b: 'b1', c: 'c1' }];

const viewer = new Viewer({ domContainer, template, inputs });
